Once your document is processed, you have several options to share it with your customers. Your customers can complete your document on their own devices (computer, tablet, phone), or you can also offer devices onsite at your business (tablets, kiosks, phones).
Here are the ways your customers can access and complete your documents:
- Web Link to include on your website, social media, emails, messages, etc.
- QR code for customers to scan on their phones/tablets
- Kiosk / App onsite
- Clover POS devices
- SMS keyword
You can include a weblink to your document on your website, social media, emails, messages etc.
You have several choices to create a better experience for your customers.
a. All documents link
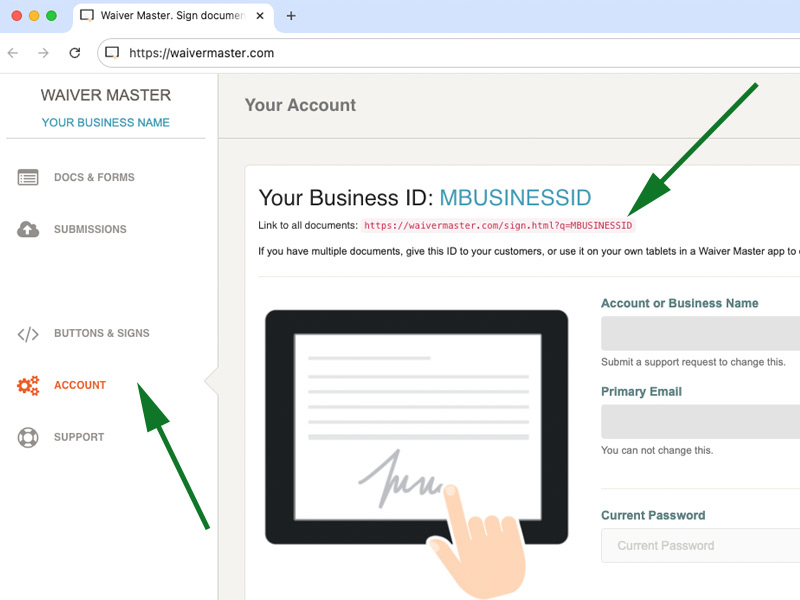
This link will take your customer to ALL of the documents in your account so that a customer can choose which one(s) to complete.
To get this link, log into your WaiverMaster control panel, click “Account” and then locate the link under your Business ID. You can also click “View All Docs” button to see what your customers will see when following this link.
Note: When you copy/paste the link, please ensure that there are no leading or trailing spaces!
b. Individual document link
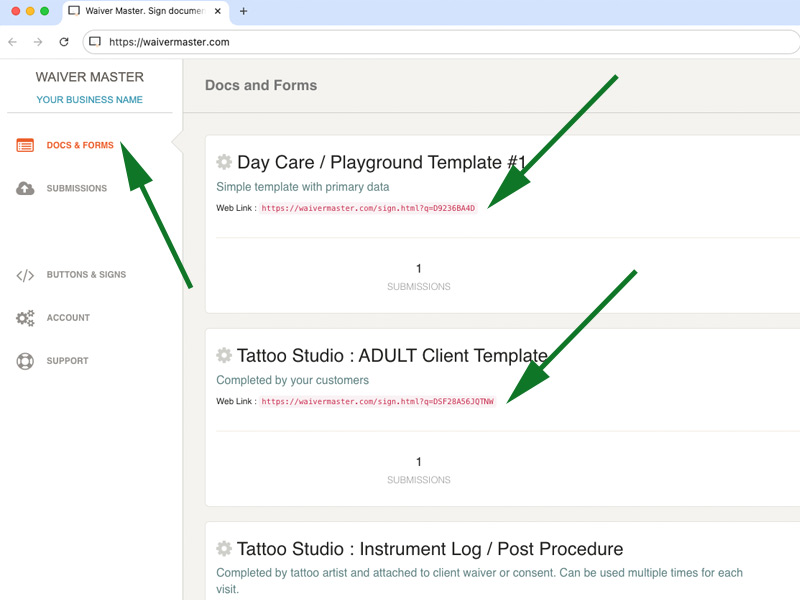
This link will take your customer to an individual document in your account. Each document has it’s own link which is created when your document is processed.
To get this link, log into your WaiverMaster control panel, click “Docs and Forms” and you will find a “Web Link” for each individual document.
Note: When you copy/paste the link, please ensure that there are no leading or trailing spaces!
c. Grouped documents link
In addition to all documents and individual document links, you can create a link for a group of documents so that your customers can complete a selection of required documents.
By default documents are not assigned to any group and you would need to select the first document to start the group.
- Log into your WaiverMaster control panel and click “Docs and Forms”
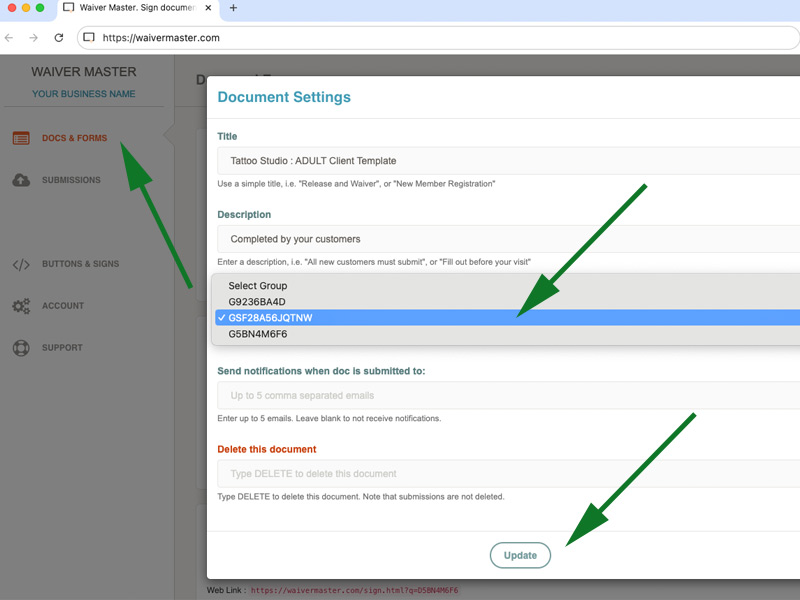
- Click on the title of the document you wish to start the group with, and note the “Document ID”
- In the popup, select the group to match the Document ID (note that Group IDs start with “G” and Document IDs start with “D”)
- Click Update
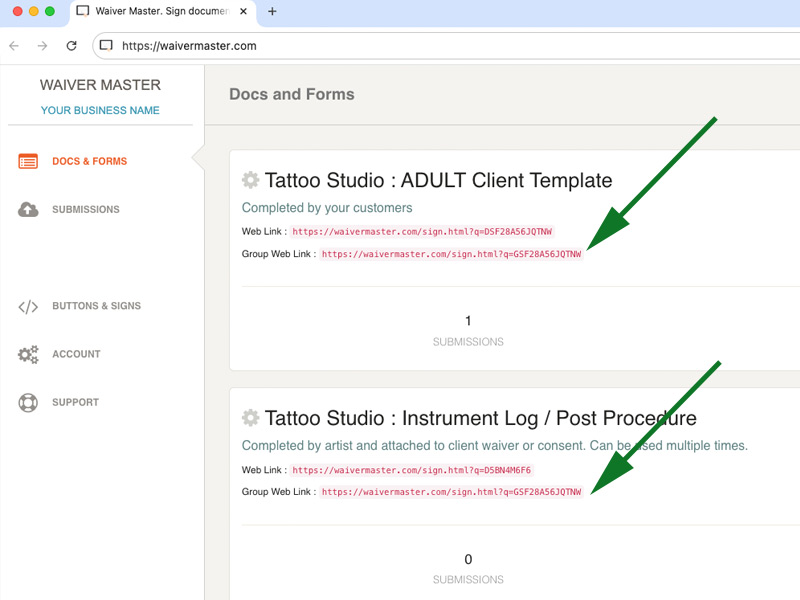
- Click the title of another document to add to the group and select the same Group ID to match the first document Group
- Repeat for any additional documents
- Each document added to the group will now display “Group Link” under the “Web Link”
Note: When you copy/paste the link, please ensure that there are no leading or trailing spaces!